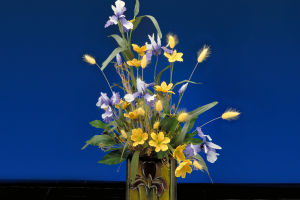
Photography is all about capturing light, and how we use it can make all the difference in our photos. Whether you're using a DSLR or a smartphone, understanding light is a basic skill that every photographer must master.
It's not just about framing your shot or arranging props; light plays the most critical role in the quality and impact of your image. Today, we'll dive into some essential lighting techniques to help you find the perfect light for your shots.
Understanding Light Quality: Hard vs. Soft Light
The quality of light refers to whether the light in your photo is harsh or soft, and this can dramatically change the mood and effect of your images. Let's take a look at both types.
1. Hard Light (Direct Light)
Hard light is intense, direct light, like the sunlight on a cloudless day, or artificial light from a flash or spotlight. Hard light creates strong contrasts between light and shadow, making the bright areas pop and the dark shadows deep. This type of light is ideal for showcasing textures and creating a bold, dramatic effect. In natural lighting, hard light usually occurs when the sun is high in the sky, typically around noon.
2. Soft Light (Diffuse Light)
Soft light, on the other hand, is gentle and diffused, often coming from an overcast sky or through a window. This type of light doesn't cast strong shadows, and it creates a smooth, subtle transition from light to dark. Soft light is perfect for portraits, especially when photographing women or children, as it softens skin tones and reduces harsh shadows.
Lighting Angles: Finding the Best Light for Your Subject
The position of your light source can dramatically change the look and feel of your photo. Here are a few lighting angles to consider:
1. Front Light
Front light is when the light source is directly in front of your subject, illuminating it evenly. It's the most common lighting technique and works great for capturing the true colors and details of a subject. You'll often see front lighting used in landscape photography, as it brings out the richness of the sky and terrain. However, front light can sometimes make your images look flat, as it doesn't cast shadows to create depth.
2. Side Light
Side lighting comes from the left or right of your subject, typically at a 45 to 90-degree angle. Side light adds dimension and texture to your photos, creating strong shadows that can enhance the depth and detail. This type of lighting is great for portraits, as it highlights the contours of a person's face and gives a more dramatic feel. It's commonly used in fashion and architectural photography to emphasize shapes and textures.
3. Backlight
Backlighting is when the light source is behind your subject. This creates a glowing effect around the subject and can produce beautiful silhouettes. While backlighting can add dramatic flair, it's tricky to get the exposure right. If done correctly, it can reveal intricate details like the shine in a model's hair or tiny particles floating in the air. When photographing people, backlighting can create a soft, ethereal look, especially if you balance the exposure with a reflector or flash.
4. Top Light
Top light comes from directly above the subject and is often seen between 11 AM and 3 PM when the sun is high in the sky. This lighting is great for landscapes, as it creates a bright, lively atmosphere. However, for portraiture, top light can cast unflattering shadows under the eyes and chin. If you're shooting portraits in this lighting, try having your subject look up to reduce the shadows on the face.
5. Bottom Light
Bottom light is rare in photography but can be used to create a dramatic, eerie effect. It comes from below the subject, often seen in theatrical lighting or certain horror movie scenes. This lighting can make a subject appear unnatural and gives off a spooky vibe. In everyday photography, bottom light is typically used in stage performances, but it can also be used creatively to add an unexpected twist to a shot.
Special Lighting Techniques: Rembrandt, Butterfly, and Split Lighting
Certain lighting styles have become signature techniques in portrait photography. Understanding these can help you add variety and depth to your portraits.
1. Rembrandt Lighting
Rembrandt lighting is a classic portrait technique where the light is positioned at a 45-degree angle to the subject. It creates a triangle of light on the subject's cheek, giving the face depth and dimension. This lighting style is ideal for dramatic and moody portraits, as it emphasizes facial features and creates a natural, yet artistic, look.
2. Butterfly Lighting
Named for the butterfly-shaped shadow under the nose, butterfly lighting is a glamorous portrait technique. The light source is placed directly above and in front of the subject. This lighting creates smooth, flattering shadows on the face and is often used in beauty photography. The result is a polished, high-fashion look.
3. Split Lighting
Split lighting involves placing the light source at a 90-degree angle to the subject, creating a striking contrast between the lit and shadowed sides of the face. This style is often used to emphasize strong personalities or add drama to the image. It's a great choice for capturing characters with a bold, confident aura.
In the world of photography, light is everything. Whether you're using hard or soft light, front or backlighting, mastering how to control and use light is the key to creating stunning, impactful images. By experimenting with different angles and techniques, we can transform ordinary scenes into extraordinary works of art. So, next time you pick up your camera, remember that the right light can elevate your photos to new heights. Keep practicing and finding the light that suits your style—your photos will thank you for it.


